Revetting pot bunkers - under the cover of darkness!
 There are many steps involved in the construction process before any work takes place. When constructing a pot bunker, the site must be visited, and all the work that needs to be carried out should be considered, i.e. design, any contour work to enable the bunker to fit into the landscape, the bunker's size and shape, the severity of the angle of the wall, the depth of the bunker, irrigation and associated works - pipes, cables, zones and decoders - construction, including time, materials and labour and, most importantly, if it is a member club, the members' wishes. All these factors have to be looked into before any sitework proceeds.
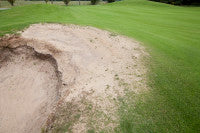
Bunkers are usually rebuilt in the same shape and style as before, in keeping with the aesthetics of the course. These bunkers usually last between five to eight years, depending on aspect and the amount of play the bunker receives. Photo 1 shows how a pot bunker can deteriorate over the year,s with photo 2 showing the damage caused by the accumulation of sand splash out.
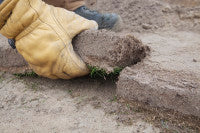
Selection of turf is important for building, as it should not have a high amount of thatch in it or long grass growth, as this will allow for excessive sinkage. Usually, the shape of the turf should be between 1" to 2" thick (photo 3), 12" wide and between 18" to 24" long.
There are two schools of thought with the layered sod, grass side up or grass side down. It is felt by some that if the grass side is up, you will have a better chance of a grass face bunker, with less chance of erosion of the face. However, during the summer months, this will incur a lot more maintenance, as the faces will have to be brushed and trimmed. Grass side down will create a black face bunker. It may need some application of herbicide, but will need little or no maintenance thereafter. However, the black face bunker is more susceptible to erosion, and will have to be rebuilt sooner.
Sand selection and depth, including consistency or texture, is also very important with pot bunkers. A 'happy' medium must be found between members' expectations of playability, and the suitability of sand to the course. Ideally, the sand should be local, native and indigenous. However, not all courses have this luxury. It is possible that over 200 tonnes of sand would be required just to fill 75 bunkers to a 2" depth. This does not include replenishment from well played bunkers,

|
|
To start the actual building, you will need some powerful lights to undertake the work, under the cover of darkness (a highly secretive thing!)
|
|
Remove approximately a metre of turf from the edge of the bunker (photo 4). Use a 12" sod cutter, and keep any good sod to use as building turf. This will reveal the full extent of the work to be completed. If there are associated contours, it is best to remove the sod from these areas too at this point. The extent of the removal of top turf depends on whether it is a rebuild or a new bunker.
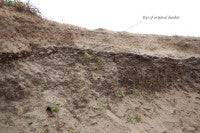
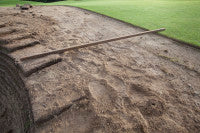
Gather all playing bunker sand into the centre of the bunker, this is used as backfill. The turf that formed the old side walls can now be removed. You will find the old original base, which by this time is a firm black layer of old turf from which the shape was determined (photo 5). On a new bunker, the first ring determines the shape, and an optional layer of sod can be used to form a base. Once the old foundations have been established, then the building of the side walls can start.
|
|
|
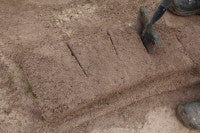
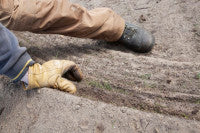
The first ring determines the shape and size of the bunker, and time must be spent on this to get it right (photo 6). The foundation must be compacted and level. A poorly formed or unlevel first ring will be seen in subsequent levels all the way up the face of the bunker. Each layer of sod must be compacted, and the backfill behind this sod must be compacted and levelled. From this point, it is just a case of repeating this ring on each level. This is repeated until the desired levels have been reached, all the time maintaining level layers, including from front to back of the turf. Cutting slits from behind makes it easier to bend the turf around (photo 7).
|

|
|
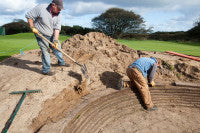
The art of building a bunker starts to come into play as you build up. Each level should be stepped back by the same amount. A thumb width is a good guide, but it may require a little more, or a little less, depending on the steepness of the face and the severity of the angle required (photo 8). The centre and top, or highest point of the bunker, should point towards the centre of the green. At the end of each step, around the sides, a triangular piece of turf is used to blend each level (photo 9). Any remaining back fill sand can be used to level off the surrounding capping area (photo 10).
|

|
|
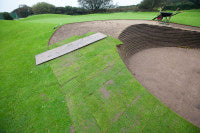
As the top layer has been shaped, a straight edge bar can help as a guide to blend the top of the bunker into the existing sward (photo 11). The turf can now be replaced around the top of the bunker (photo 12). Start at the lowest point when re-capping the bunker, and start the sodding from the bunker edge and work out, this ensures the turf will stay firm and locked into place (photo 13)

|

|
A turf floor, if not already present, should be laid down with the grass side down (photo 14). This ensures the grass dies, and stops stones coming up from the sand below, and also allows the raker to maintain the desired level of sand in the bunker. In Rosslare, this is as close to 2" as possible.
At this point, we can trim the bunker edge, and place in the newly chosen bunker playing sand. The sand can be placed in level with the floor, or a small amount added at the base of the wall to create a dish shape. It is important to compact this as a ball can plug in it. The dish shape attempts to give the golfer a better chance, as the ball will roll away from the bottom of the wall.
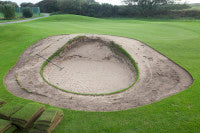
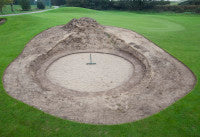
In general, it will take a couple of staff three to four days to complete an average size pot bunker. It does depend, again, on the amount of contour work to be completed outside the bunker, and the size of the bunker (main photo above).
It is unfortunate, with the advent of televised golf and expectancy of golfers, that players should have a perfect lie and an easy shot from the bunker. History has been long forgotten, a pot bunker was once formed by grazing sheep scraping out the ground to find shelter, and became an exposed area of sand and, ultimately, a hazard to be avoided.
This article first appeared in Greenside magazine, the official publication of the GCSAI. www.gcsai.org
