Soil Sampling
Understanding what is going on below the surface is critical for successful turfgrass management. Visual inspections, backed up with a professional analysis of soil properties, will give vital information about the condition of the soil and help to produce a more productive environment for plant growth and sustainability.
 A simple 'visual, feel and smell' inspection of a soil sample can identify many things:
- Thatch content (dead grass and fibre found in the top 5-35mmof the sample)
- Dryness/wetness of soil (soil water content)
- Soil compaction (lack of airspace in the soil)
- Presence of black layer and algae
- Anaerobic conditions (indicated by a smell similar to rotten eggs)
- Extent of soil layering (indicated by root breaks)
- Root depth and vigour
- Pest and disease problems
- Extraneous matter content (glass, ceramics and stone)
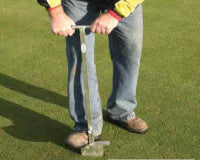
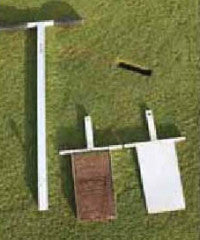
The easiest way to make this inspection is by using a soil sampler. They come in different shapes and sizes and are designed for different reasons; some allow you to see a clean profile of your soil without removing it from the sampler, while others simply collect a soil core.
On a regular basis (at least once a year) soil samples should be collected and sent away to a laboratory for a detailed analysis. The testing can reveal a lot of important data to help you diagnose any problems and to make an informed decision on future maintenance regimes.
The following five soil tests are the ones you should be aware of:
- Particle Size Distribution (PSD) soil classification (soil type)
- Soil pH (acidity level of the soil)
- Soil nutrient status
- Soil Organic Matter (OM) content
- Soil Toxicity
 The standard soil analysis package measures acidity (pH) and estimates the plant-available concentrations of the major nutrients in the soil - phosphorus(P), potassium (K) and magnesium (Mg). Soil acidity is measured as pH(the concentration of H+ ions) the scale running from pH1 (very acid), through pH7 (neutral) to pH14 (very alkaline).
The normal soil range is pH4.5-8.5. When taking samples for analysis you will, in most cases, be required to collect at least one kilo of material. This is required by most soil laboratories, particularly if undertaking ParticleSize Distribution tests to determine the amount of clay, silt and sand in the soil.
A representative sample of soil will need to be taken from several areas of the facility, and at the appropriate depth, usually the top100-150 mm. For example, taking samples of a football pitch would require taking twenty-four samples (twelve from each half) taken from different areas of the pitch.
Sample on a 'W' pattern over the field; for a regular shaped field this means six cores per leg of the 'W'.All the soil material is mixed together and put into one bag and sent away to an approved registered lab for analysis. The same 'W' technique should also be used on fine turf areas (golf and bowling greens).
Remember to clearly label all samples and record the time, location and date when they were taken.
Guide to sampling
1. Use of a suitable tool (coneauger, screw auger, corer etc.) which facilitates and encourages the taking of more rather than fewer cores, of a uniform size and d own to the full depth of sampling.
2. Use equipment and packaging that will not contaminate the sample. Galvanised sampling tools are unacceptable fo rtrace element analysis.
3. Label samples clearly.
4. Sample to a consistent depth, usually between 100-150mm.
5. Divide the field into areas which are as uniform as possible in soil type. Smallareas of different soil e.g. wet,chalky, shallow, stony etc. should be excluded.
6. Avoid taking samples from mole hills, urine patches.
 7. Discard stone debris.
8. Take at least between twenty to twenty-five cores from each area to be sampled and put them together to form a single representative sample. The numbers of cores should not be restricted simply because the container is full! Thoroughly mix all cores and take a sub-sample from this for despatch to the laboratory - this must be done carefully.
9. Ensure the sample represents the whole area. Sample on a 'W' pattern over the field; for a regular shaped field this means six cores per leg of the 'W'.
10. Avoid sampling under extremes of soil conditions e.g.waterlogged or very dry soil.
A range of soil samplers areavailable in the Pitchcare shop:
 The soil profile sampler is a very useful tool, especially for fine turf situations where you want to see a wide profile of the green down to a depth of 200mm. Cost £109.00.
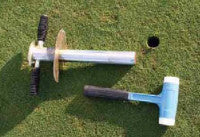
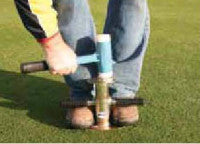
The impact 50mm soil sampler is specially designed for taking samples on cricket squares (heavyc lay soils) the sampler takes a 50mm wide core down to a depth of 300mm. Cost £122.25.
Standard core samplers come in a range diameter sizes (16mm,20mm, 25mm, 38mm) usually to a depth of 300mm. Costs range between £40-£60.
All off the BMS Samplers are available in the Pitchcare Shop see Link :- Samplers
For a soil sampling kit and array of different analyses: PWS analysis service
